PLEASE MAKE SURE THAT ALL OF THE PC IN THE CLINIC HAVE [TEMP FOLDER] IN THE C: DRIVE
Below please follow instructions on how to integrate coDaignistX software with Dental Studio Plus V3.30.0
1.Please Download below files as you will need them for this process:
coDiagnostix_Integration Dental Studio V3.30.0
1. ImageDatabase B2721.exe (Be Able to import cases to CoDiagnostiX Software)
2.VR B1317.exe (Fixes 3D DICOM crash in DS software and integrates with CoDiagnostiX)
2. On each PC in the clinic please Copy the following files to below path of Dental Studio Plus V3.30.0
1. ImageDatabase.exe: C:\Program Files (x86)\DentalStudioPlus
2.VR.exe : C:\Program Files (x86)\DentalStudioPlus\Modules\System
Note: when you copy the files over to the correct locations please rename the files as ImagesDeatabase.exe and VR.exe
PLEASE MAKE SURE THAT ALL OF THE PC IN THE CLINIC HAVE [TEMP FOLDER] IN THE C: DRIVE
Please note that the Path may be different but the location of where the folder will be the same please copy the two
3. Next, up will be installing the license of coDaignostiX into the Server of the clinic.
1. Please tell one of the staff to locate the license key of the coDiagnostiX software
2. Please connect the License Key to the server
3. In the Map drive of Dental Studio DB, the software of coDiagnostiX will be there
4. Run the installer follow the screen's then it will give you an option to install full software or Network License.
5. Please click choose Network License install
6. Then you will need to allow the Key in the firewall in the server.
7. Location of the license is: C:\Program Files (x86)\coDiagnostiX\coDiagnostiX.App\eToken\STMSLMSrv.exe
8. The file you need to allow is called STMSLMSrv.exe
9. Please test by login to the capture software and clicking on coDiagnostiX software.
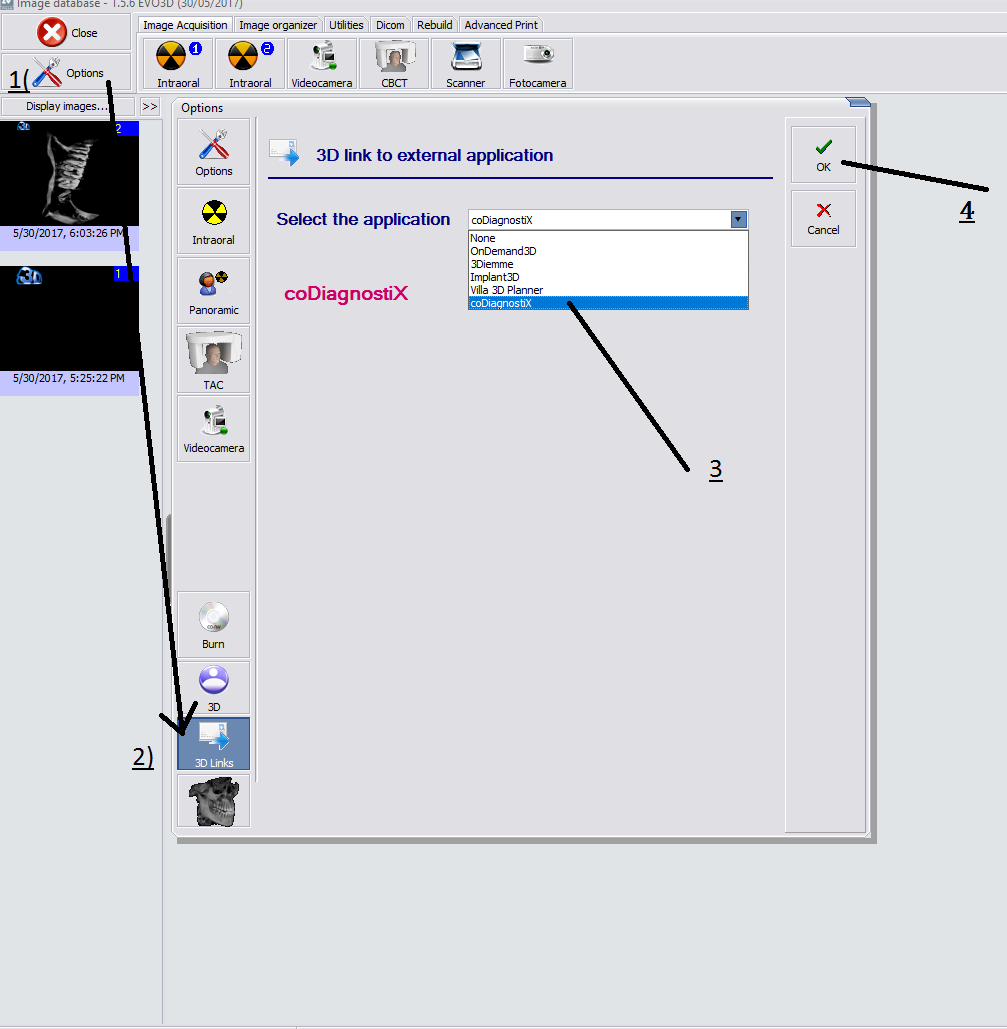
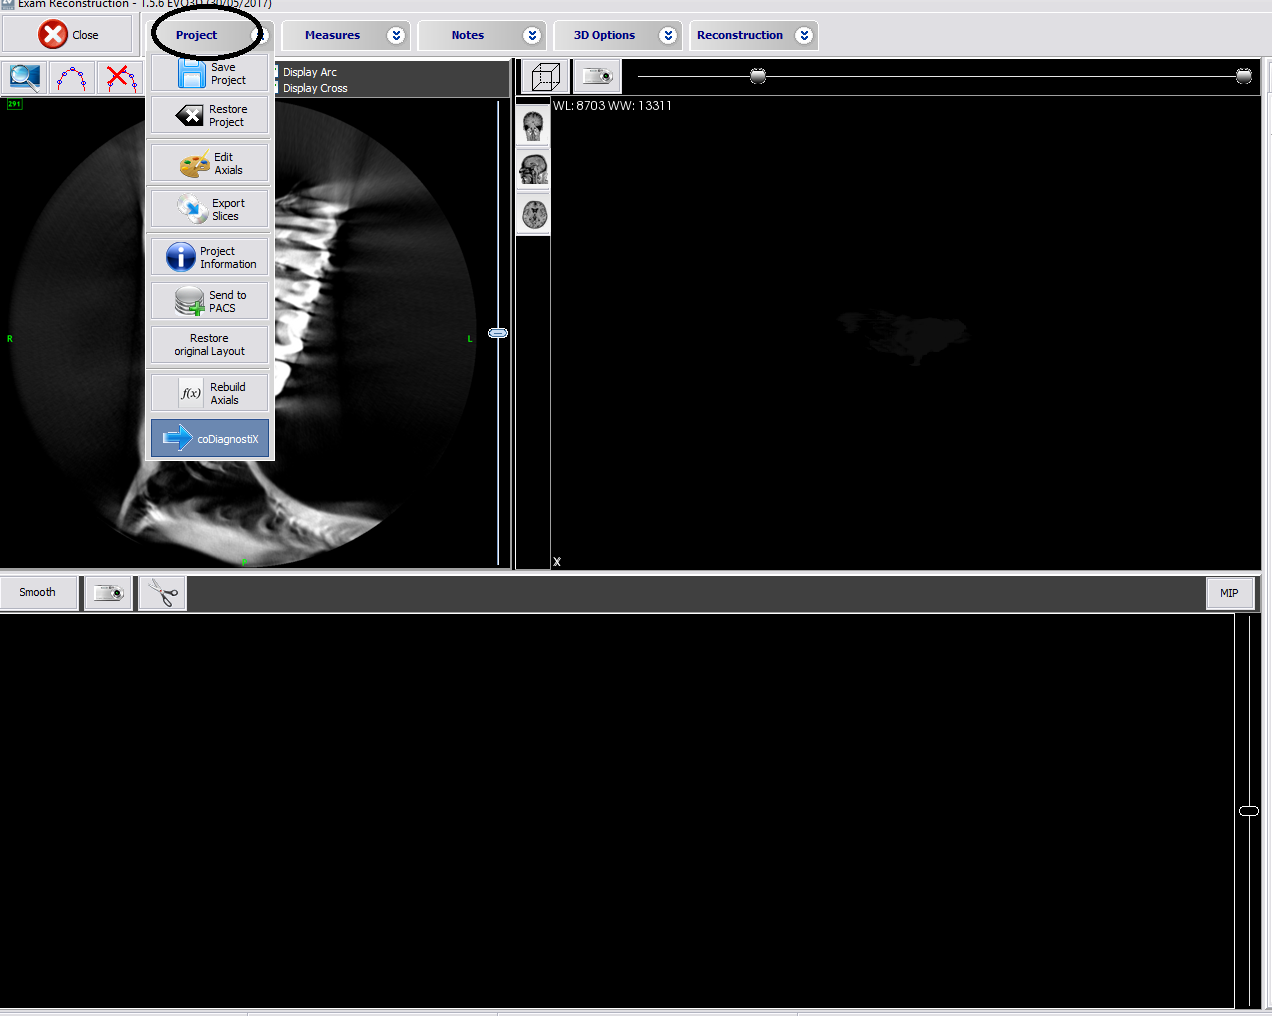
See Below HOW TO EXPORT IMAGE TO CODIAGNOSTIX

If you need our help please follow below link to schedule with tech support.
|
Rate this Topic:
|
|||
|