The following are instructions to remove and replace the Signal Cable N2, the main harness providing power and signal to the sensor board of Rotograph D and Rotograph D Re-sytle Digital Panoramics.
Time Required
- 1 to 1.5 hours including removal of covers, removal of existing cable harness and installation, testing and putting covers back
NOTE: IT IS RECOMMENDED TO VERIFY RESOLUTION OF THE FAULT, TO RUN THE NEW HARNESS EXTERNALLY BEFORE REMOVING THE OLD. STOP THE ROTATION EARLY BY RELEASING THE EXPOSURE BUTTON IF IT APPEARS THE CABLE MAY BE PULLED BY A FULL ROTATION. TAKE NOTE OF EXISTING INPUT / OUTPUT CONNECTIONS WHERE THE HARNESS PLUGS INTO THE SENSOR BOARD. THE BOARD IS NOT LABELED.
You will need
- Signal Cable N2 (n. 6208532000)
- metric allen keys
- white lithium grease
- plastic gloves
- phillips screwdriver
- snips
- easy remove tape (painters tape) [recommended]
- snake (recommended)
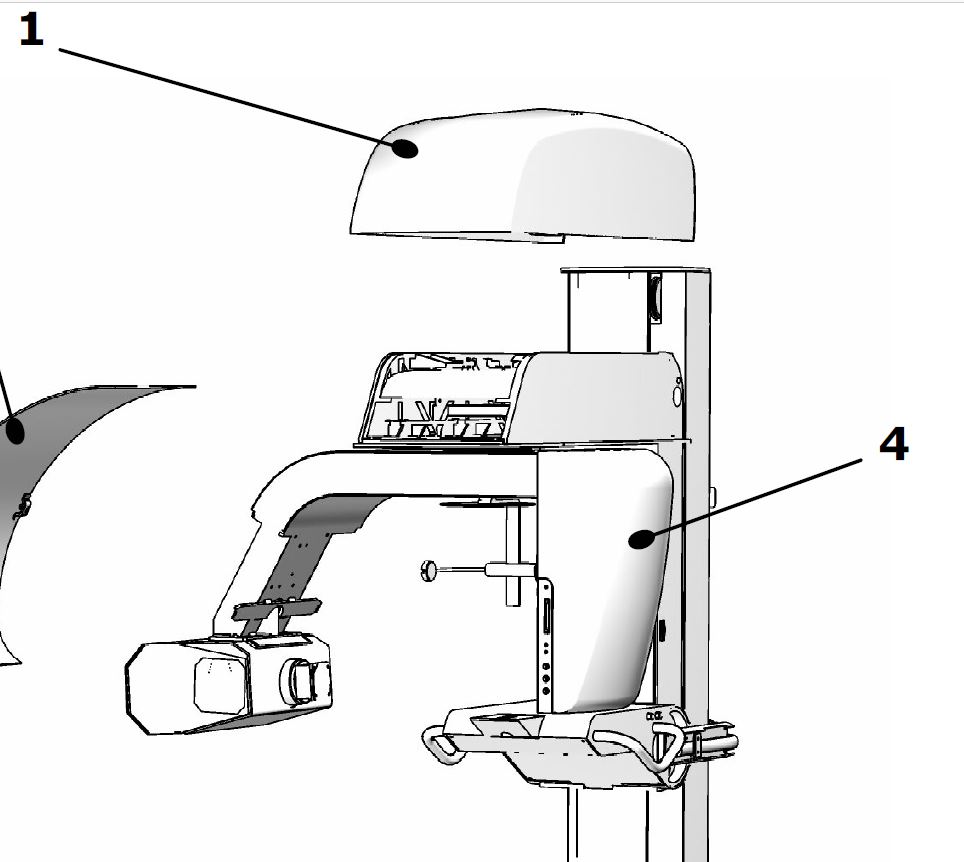
STEP 1. Remove 4 screws for sensor cover - 2 on top, 2 on bottom (Ref #4 below)
NOTE: MACHINES WITH SERIAL NUMBER < THE FOLLOWING NUMBERS WILL HAVE THE NON-RESTYLE COVERS, AND REMOVAL OF SUCH COVERS WILL VARY FROM THE INSTRUCTIONS AND/OR VISUALS PROVIDED HERE : Rotograph-D DENT-X version: 11050686 OR Rotograph-D 120V VILLA version: 11090726
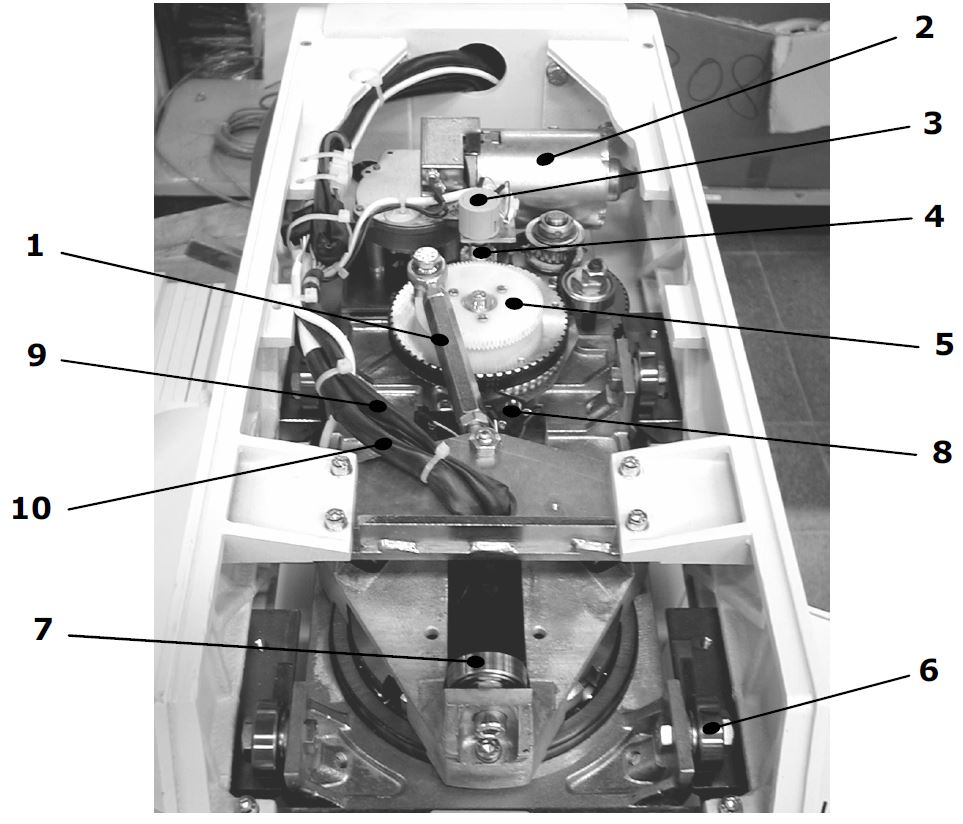
STEP 2. IMPORTANT - Take note of input / output label on the wired connections to sensor board BEFORE UNPLUGGING.
STEP 3. Lower machine and lift and remove top cover (screws underneath the top compartment) [ref #1 in covers diagram from Step 1]
NOTE: YOU MAY NEED TO ROTATE ARM MANUALLY TO REACH ALL SCREWS. POWER OFF MACHINE FIRST BEFORE MANUALLY MOVING ARM!!!
NOTE: THE REMOVAL OF COVERS MAY CAUSE THE COUNTERWEIGHT TO SLOWLY LIFT THE SYSTEM UPWARD ON THE COLUMN WHEN THE SYSTEM IS POWERED OFF. SECURE WITH WEIGHTED OBJECTED OR USE THE SET PIN TO PREVENT THIS.
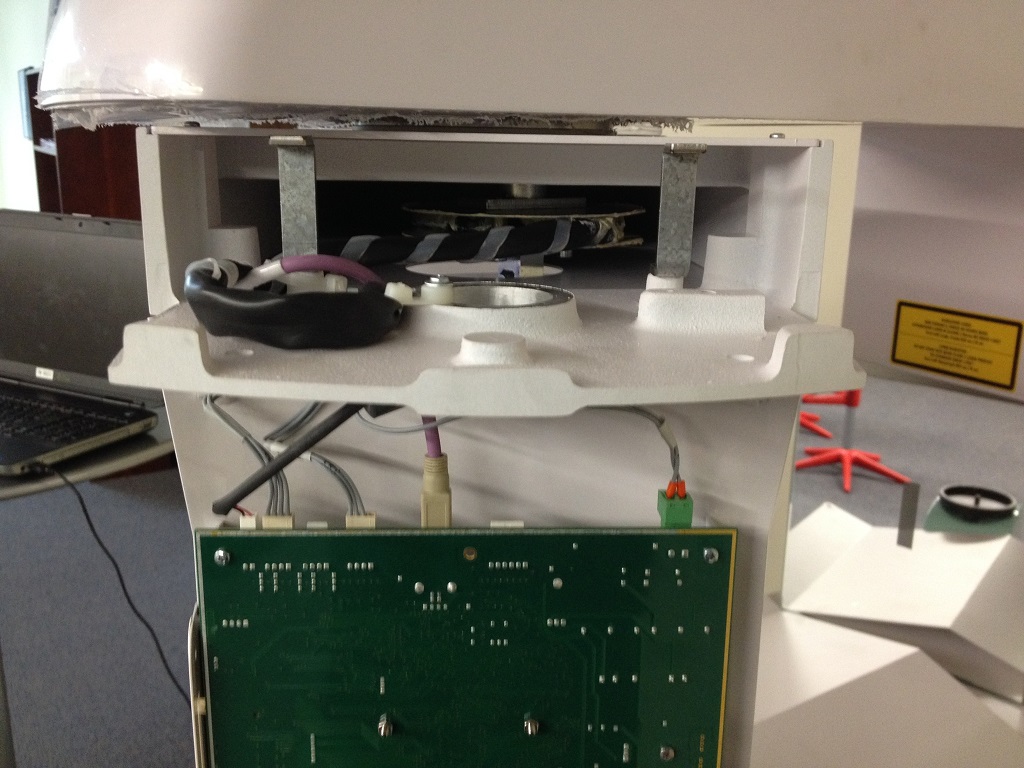
STEP 4. Locate in upper compartment where signal cable N2 (from sensor) meets N1 connector (Ref. 9 below)
STEP 5. Unplug existing cabling, plug new cable harness EXTERNALLY to test without completely removing old harness.
NOTE: be careful during rotation so not to pull the cable harnesss, you may have to release the exposure button early
STEP 6. To replace, remove covers above headrest assembly to access the existing cable
STEP 7. Remove tie wrap from the old cable
STEP 8. You may snip the old cable and tape to the new cable harness to feed through making sure not to muddy the connections with grease
STEP 9. Lubricate new harness tubing well with white lithium grease, and use the tie wrap to position the harness in the exact same fashion with the exact same amount of slack as old harness.
STEP 10. Before putting back covers, test x-ray numerous times on a calibration tool or object, making sure no error occurs and final image is loaded completely onto the PC capture program
|
Rate this Topic:
|
|||
|